


How to Properly Bloom Coffee Grounds for Better Taste
Table of Contents
- What Is Coffee Blooming and Why It Matters
- Coffee Bloom Water Ratio: Getting the Proportions Right
- Coffee Bloom Duration: How Long Should You Bloom
- Step-by-Step: How to Bloom Coffee Grounds
- Blooming for Different Brewing Methods
- Degassing Coffee Beans and Bloom Performance
- Common Blooming Mistakes and How to Fix Them
- Frequently Asked Questions
Last Updated: October 4, 2026
What Is Coffee Blooming and Why It Matters
Coffee blooming is the process of saturating dry grounds with water before full brewing begins. When hot water first contacts fresh grounds, carbon dioxide (CO2) trapped inside escapes rapidly. This initial release causes the grounds to swell and bubble, that's the bloom. It typically lasts 30 to 45 seconds, though timing varies by grind size and coffee freshness.
A proper bloom unlocks better flavor by removing the CO2 barrier that prevents even water penetration. Without blooming, uneven extraction creates sour, bitter, or flat-tasting coffee.
The Role of CO2 and Degassing
Fresh coffee beans contain trapped CO2 from roasting. When you pour water on dry grounds without blooming, CO2 creates a barrier that prevents even saturation. Blooming forces degassing upfront: the grounds swell as gas escapes, removing the barrier and allowing water to penetrate evenly. Fresh beans bubble noticeably; older beans release less gas, a visual cue to bean age.
How Blooming Affects Extraction Quality
Extraction dissolves soluble compounds from grounds into water. Without blooming, water channels through gas pockets, causing some grounds to over-extract (bitter) and others to under-extract (sour). A proper bloom ensures uniform saturation, creating even extraction and a more balanced cup with cleaner flavor and better acidity.
Coffee Bloom Water Ratio: Getting the Proportions Right
For blooming, use roughly twice the weight of water as coffee grounds (e.g., 40 grams water to 20 grams coffee). Too little water leaves CO2 pockets; too much begins extraction prematurely. This 1:2 ratio stays consistent across all brewing methods. After blooming, add remaining water for your total brew ratio.

Coffee Bloom Duration: How Long Should You Bloom
The ideal bloom time is 30 to 45 seconds for most brewing methods. This window allows sufficient CO2 release without beginning extraction. However, optimal duration varies significantly based on roast profile, grind size, bean age, and water temperature, and understanding these variables transforms blooming from a rote step into a diagnostic tool.
Roast Profile and Degassing Speed
Light roasts and dark roasts degas at fundamentally different rates, and this difference should dictate your bloom strategy.
Light roasts retain CO2 stubbornly due to denser bean structure and shorter roasting time. They need 45 to 60 seconds of blooming and show less vigorous bubbling than darker beans. Rushing the bloom leaves CO2 pockets, causing uneven extraction and a sharper, more acidic cup.
Dark roasts have porous bean structure and release CO2 rapidly in the first 20 to 30 seconds. A 30 to 40 second bloom is sufficient; extending beyond 45 seconds risks premature extraction and muddies flavor clarity.
Water Temperature Impact on Bloom Kinetics
Water temperature directly controls how fast CO2 molecules escape from the grounds. This is one of the most overlooked variables in blooming guides.
At 195°F, CO2 release is slow; extend bloom to 45 to 50 seconds. At 200°F to 205°F (optimal), vigorous bubbling appears within 10 to 15 seconds; 40 seconds is ideal. Above 210°F, CO2 escapes too rapidly, causing uneven swelling and premature extraction.
Finer grinds expose more surface area and accelerate CO2 release: espresso-fine needs 20 to 30 seconds, medium (pour-over) needs 40 seconds, coarse (French press) needs 45 to 60 seconds.
Beans roasted 3 to 7 days ago bloom vigorously. Older beans (past 3 weeks) bloom slowly and show minimal activity, most CO2 has already escaped naturally, diminishing blooming's benefit.
Practical Bloom-Time Strategy
Baselines: light roast + 195°F + medium grind = 50-60 sec; medium roast + 200°F + medium grind = 40 sec; dark roast + 205°F + medium grind = 35-40 sec. Add 10-15 sec for coarse grinds, subtract 10-15 sec for fine grinds. Weak blooms signal water temperature or bean age issues, not duration. Vigorous blooms that subside quickly can be shortened next time.
Step-by-Step: How to Bloom Coffee Grounds
Blooming is straightforward once you know the process. Here's exactly how to do it, with visual and sensory checkpoints to confirm success at each stage.
Preparing Your Grounds and Water
Grind immediately before brewing to retain CO2. Heat water to 195°F to 205°F using a temperature-controlled kettle or by cooling boiling water for 30 seconds. Measure coffee and water precisely by weight using a kitchen scale: use roughly twice the weight of water as coffee grounds. Place grounds in your brewing device and level them evenly to ensure uniform blooming and extraction.
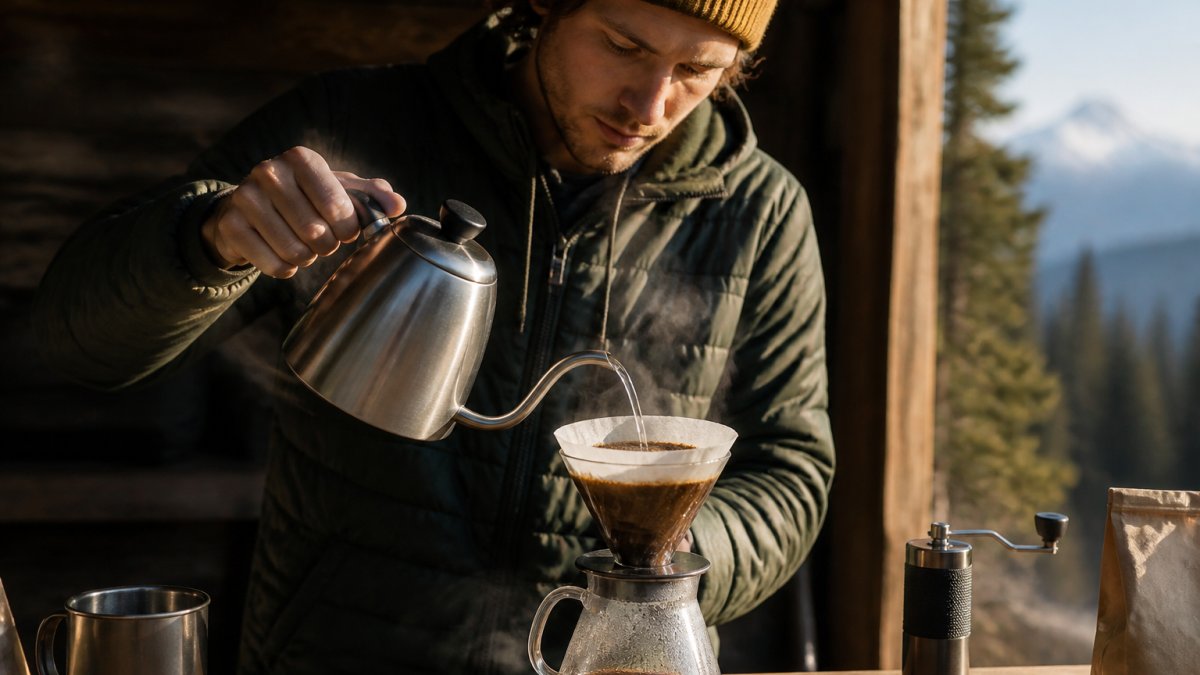
The Bloom Phase: Pouring and Observation
Pour bloom water slowly over 10 to 15 seconds in a circular motion to saturate grounds evenly. Grounds should darken immediately; foam should rise within 3 to 5 seconds. A flat, still surface indicates weak degassing (check water temperature or bean age). Once wet, stop pouring and set a timer for 40 seconds (adjust for roast profile and water temperature). Do not stir; stirring disrupts degassing and causes uneven extraction.
Visual Indicators of a Successful Bloom
A successful bloom shows: active bubbling and foaming (most vigorous in first 15-20 seconds, subsiding by 40 seconds); visible swelling and crust formation (indicating thorough degassing); uniform dark-brown wetting with no dry patches; intensified aroma (sign of accessible aromatic compounds); and slight upward rise in the coffee bed.
Visual Indicators of a Weak or Failed Bloom
If your bloom doesn't match the above, troubleshoot using these cues:
Minimal bubbling suggests stale beans (use fresher beans within 7-10 days), water too cool (aim for 200°F-205°F), or grind too coarse (grind finer). Uneven wetting indicates uneven pouring or unleveled grounds; pour slowly in circular motion and level grounds before pouring. No aroma change or flat coffee bed suggests checking bean freshness and water temperature, or extending bloom time by 10-15 seconds.
After the Bloom: Transitioning to Main Brew
When the timer reaches 40 seconds, the bloom is complete and grounds are ready for extraction. For pour-over, begin your main pour immediately in stages. For French press, add remaining water, stir gently, place the lid on, and steep for 3 to 4 minutes total. Maintain consistency: bloom the same way each time, observe visual cues, and adjust only one variable at a time to identify what works best.
Blooming for Different Brewing Methods
Blooming works for most brewing methods, but technique varies slightly.
Pour-Over Blooming Technique
Pour-over brewing benefits greatly from blooming. The method's precision makes blooming easy to execute.
Place your filter and grounds in the pour-over cone. Pour your bloom water in a slow, circular motion. Wet all grounds evenly. The water should drip through slowly into your cup or carafe below.
After 40 seconds, begin your main pour. Add the remaining water in stages, maintaining a steady water level in the cone. This staged approach (bloom, then main brew) gives you complete control over extraction.
The pour-over method is ideal for learning blooming technique because you can see exactly what's happening at every stage.
French Press Blooming Technique
French press blooming works differently because the final brewing uses immersion (grounds sit in water).
Add your grounds to the French press. Pour your bloom water and stir gently with a spoon. Break up any clumps. Let the bloom happen for 45 to 60 seconds.
After blooming, add the remaining water needed for your total brew ratio. Stir again gently. Place the lid on the French press (but don't press the plunger yet).
SHARDOR Precision Electric Coffee Grinder with Removable Bowl →
Let the full brew steep for 4 minutes total. Then slowly press the plunger down. The blooming phase has already started extraction, so your total steep time is shorter than if you skipped blooming.
French press blooming is less precise than pour-over but still effective. The key is blooming first, then completing the immersion.
Degassing Coffee Beans and Bloom Performance
Fresh beans bloom vigorously. Older beans bloom weakly. This difference comes down to residual CO2.
Beans release CO2 continuously after roasting. Peak degassing happens in the first 3 to 5 days. By day 7, most CO2 has escaped naturally. By day 21, very little remains.
This timeline matters for blooming:
- Days 3 to 7 post-roast, Ideal blooming window. Beans release gas readily. Blooming is highly effective.
- Days 7 to 14, Still good. Blooming works well, though gas release may be slightly slower.
- Days 14 to 21, Acceptable. Blooming still helps, but the effect is less dramatic.
- Beyond day 21, Blooming becomes less critical. Most CO2 is already gone.
Older beans still benefit from blooming, but the bloom will look less vigorous. You may need to extend bloom time slightly. The flavor improvement will still be noticeable, just less dramatic than with fresh beans.
Common Blooming Mistakes and How to Fix Them
Even experienced coffee drinkers make blooming errors. Here's what to watch for.
Mistake: Skipping the bloom entirely
Many people assume blooming wastes time. They pour all their water at once. The result is uneven extraction and flat, one-dimensional flavor.
Fix: Always bloom. The 40 seconds you invest returns measurable flavor improvement. It's not optional.
Mistake: Using water that's too cool
Water below 195°F doesn't release CO2 effectively. The bloom looks weak. Extraction suffers.
Fix: Use a thermometer or temperature-controlled kettle. Aim for 200°F to 205°F. If you don't have a thermometer, let boiling water cool for 30 seconds.
Mistake: Pouring bloom water too quickly
Fast pouring creates splashing and uneven wetting. Some grounds stay dry. Others get over-saturated.
Fix: Pour slowly in a circular motion. Take 10 to 15 seconds to pour your bloom water. Control matters more than speed.
Mistake: Blooming for too long
Extended bloom times (over 60 seconds) begin extraction before you're ready. You lose control over brew timing.
Fix: Stick to 40 to 60 seconds maximum. If your bloom looks weak after 40 seconds, the problem is likely water temperature or bean freshness, not bloom duration.
Mistake: Using old or stale beans
Beans older than 3 weeks have lost most CO2. Blooming becomes less effective. The flavor improvement is minimal.
Fix: Buy fresher beans. Check the roast date. Use beans within 10 to 14 days of roasting for best results.
Mistake: Not measuring water and coffee precisely
Guessing at ratios leads to inconsistent blooms and inconsistent flavor.
Fix: Use a kitchen scale. Measure both coffee and water by weight. Precision is the foundation of repeatable results.
Blooming coffee grounds is one of the highest-impact techniques in home brewing. It requires minimal equipment and just 40 seconds of attention, yet it transforms flavor quality. The difference between a bloomed and unbloomed cup is immediately noticeable.
If you're serious about improving your daily coffee, start blooming. Invest in a quality grinder like the SHARDOR Precision Electric Coffee Grinder with Removable Bowl to grind fresh beans immediately before brewing. Pair it with fresh, properly stored beans, and you'll taste the difference blooming makes. Better extraction, cleaner flavor, more balanced acidity, that's what blooming delivers.

Frequently Asked Questions
How long should you bloom coffee grounds?
Most coffee professionals recommend blooming for 30 to 45 seconds. This timeframe allows enough CO2 to escape and water to saturate the grounds evenly. Lighter roasts may benefit from slightly longer blooms (up to 60 seconds) due to higher gas content, while darker roasts often need only 30 seconds. Consistency matters more than exact timing, watch for the bloom to settle before proceeding with your brew.
What is the ideal coffee bloom water ratio?
Use roughly twice the weight of water to coffee grounds during the bloom phase. For example, if you have 20 grams of grounds, use about 40 grams of water. This ratio ensures complete saturation without over-diluting. Adjust slightly based on grind size: finer grinds may need slightly less water, while coarser grinds benefit from a touch more to ensure even contact.
Does blooming coffee really make a difference in taste?
Yes. Blooming removes CO2 trapped in freshly roasted grounds, which blocks water from extracting flavors properly. Skipping the bloom often results in under-extracted coffee that tastes sour or thin. Blooming improves extraction uniformity, leading to cleaner, more balanced flavor profiles with better acidity and reduced bitterness. The difference is most noticeable with fresh beans within 2-4 weeks of roast.
Can you over-bloom coffee grounds?
Yes, blooming longer than 2 minutes can lead to over-extraction and stale flavors. Extended bloom times allow water to pull out unwanted compounds, resulting in bitter or flat-tasting coffee. If your bloom extends beyond 90 seconds, your water temperature may be too high or your grind too fine. Stick to 30-60 seconds for optimal results with most brewing methods.